WEEK 05 - MODELS
◦ 02 - MODEL 2 / Cardboard model of room
◦ 03 - Paper folding techniques
◦ 04 - MODEL 3 / Room modification model #1
◦ 05 - MODEL 4 / Room modification model #2
◦ 06 - MODEL 5 / Room modification model #3
◦ 07 - MODEL 6 / Room modification model #4
0 1 - P A P E R M O D E L
-------------------------------------------------------------------------------------------------
M O D E L 1
This model communicates the predominant functions of my own personal room at home,
which are study and sleep/rest.
Human figure is 160cm at 1:10 scale.
Completed Tuesday, 31 March 2020.
which are study and sleep/rest.
Human figure is 160cm at 1:10 scale.
Completed Tuesday, 31 March 2020.
-------------------------------------------------------------------------------------------------
0 2 - C A R D B O A R D M O D E L
-------------------------------------------------------------------------------------------------
M O D E L 2
A more minimal sketch model of my workspace using corrugated cardboard.
Human figure is 160cm at 1:20 scale.
Completed Wednesday, 1 April 2020.
Completed Wednesday, 1 April 2020.
PAPER VS. CARDBOARD
In terms of materiality in my model making, paper was definitely easier to work with. Compared to corrugated cardboard, paper allows for cutting clean and precise line work. Delicate detailing in the two large windows' glazing bars were achieved because of this. Paper's ability to be easily folded also allows for the tongue/tab gluing technique to join edges together.
However, with paper's fragile nature comes also flimsiness and instability. Even when using 110gsm paper, my first model was unable to stand upright without adding support frames using wooden skewers.
Corrugated cardboard, though much more durable and stable than paper, is more difficult to cut. It is even more so difficult to cut precise details, hence why I had decided to add glazing bars onto the windows using kraft paper instead.
---------------------------------------------------------------------------------------------------------
F O L D I N G T E C H N I Q U E S
---------------------------------------------------------------------------------------------------------
Following video tutorials from
ABOVE: Completed paper folding techniques from linked videos.
BELOW: Individual techniques shown.
-----
ABOVE: DIVIDING THE PAPER / BASIC PLEATS
ABOVE: SIMPLE SPIRALS / V-PLEATS
ABOVE: X-FORM SPANS / MASU BOX
ABOVE: NO-CREASE
BELOW: CRUMPLING
---------------------------------------------------------------------------------------------------------
0 3 - R O O M M O D I F I C A T I O N
---------------------------------------------------------------------------------------------------------
M O D E L 3
Rough sketch model for room extension using v-pleat and x-form span techniques.
Extensions add geometric interior and exterior detailing.
Extensions add geometric interior and exterior detailing.
Human figure is 160cm at 1:20 scale.
Completed Friday, 3 April 2020.
Completed Friday, 3 April 2020.
-----
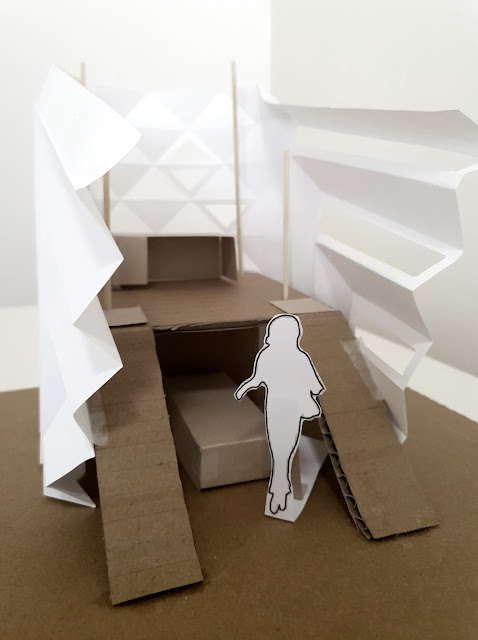
M O D E L 4
1 : 2 0
Modification of previous rough sketch model of room extension, including dynamic walls using the v-pleat and x-form span techniques.
Also added a mezzanine level dedicated for a study workspace.
Below the mezzanine level ceiling is a dedicated space for sleep. This area features a low-ceiling (slightly below head-height) to create a safe, enclosed atmosphere.
On either side of the mezzanine platform are two rectilinear cardboard pieces to indicate where stairs should be to connect the ground floor to the mezzanine level.
Human figure is 160cm at 1:20 scale.
-----
M O D E L 5
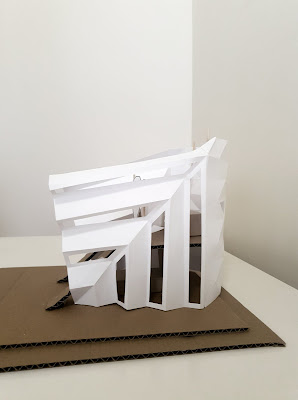
My aim for this model was to challenge the boundaries of how architectural spaces for the contemporary home are designed and perceived. I also wanted to incorporate the techniques learnt through the paper folding exercises earlier more creatively, without much restriction on the architectural form. (i.e. Not restricting myself to 'renovate' or extend an existing room or house design, but rather use the techniques learnt to design a completely new space.)
My fifth model is more abstract, using the crumpling technique as a basis for a conceptual house situated along a main road. The context of this site is taken from my own home, which is placed right in front of the main road in Glenwood. For this model, the space in which my house originally occupies has been extended to fit two land lot spaces.
Human figure is 160cm at 1:100 scale.
ABOVE: Front view
ABOVE: Top view
With my home located in the Hills District, my aim for this model was to emulate its immediate site context. Thus, the use of mountain paper folds to create its curved nature was intended to reflect the hilly terrain.

ABOVE: Aerial views of model, showing the relationship with the urban context (i.e. main road).
-----
M O D E L 6
M O D E L 6
1 : 5 0
Pavilion-style outdoor studio workspace using the no-crease and v-pleat techniques.
Human figure is 160cm at 1:50 scale.

ABOVE: Front view
ABOVE: Top view

ABOVE: East view, showing the relationship between the user and the space.
Here, it can be seen that the user is able to enter the pavilion-style outdoor studio through a gap towards the back of the building.
Pavilion-style outdoor studio workspace using the no-crease and v-pleat techniques.
Human figure is 160cm at 1:50 scale.

ABOVE: Front view

ABOVE: East view, showing the relationship between the user and the space.
Here, it can be seen that the user is able to enter the pavilion-style outdoor studio through a gap towards the back of the building.


Comments
Post a Comment