WEEK 05 - FUSION 360 (2.5D)
---------------------------------------------------------------------------------------------------------------------
ONLINE TUTORIAL 2.5D SHAPES AND ASSEMBLIES
---------------------------------------------------------------------------------------------------------------------
ONLINE TUTORIAL 2.5D SHAPES AND ASSEMBLIES
---------------------------------------------------------------------------------------------------------------------
F U S I O N 3 6 0
Total volume occupied by model at 1:1 scale:
228mm x 267mm x 129mm
ABOVE: South-east view of Fusion 360 model.
ABOVE: South-west view of Fusion 360 model.
ABOVE: North-east view of Fusion 360 model.
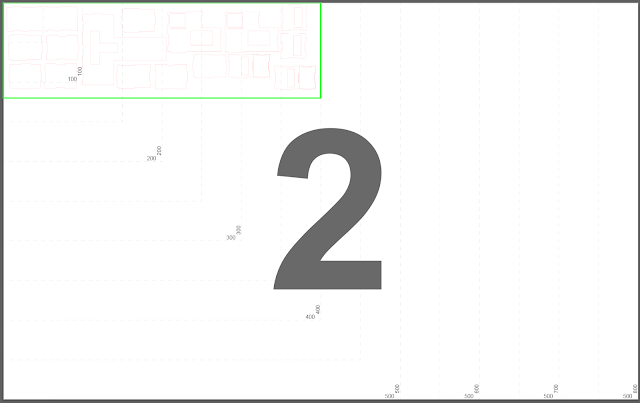
ABOVE: Drawing of model layout ready to transfer to Illustrator.
(Overlapping previously hidden components removed later in Illustrator)
(Overlapping previously hidden components removed later in Illustrator)
Drawing fits all components at 1:2.5 scale onto a single A2 sheet. This scale was chosen as I felt it was the most appropriate when considering both the 400mm x 120mm material boundary and the size of each component.
1:1 was far too large of a scale to fit each component comfortably in the material boundary, even if it was spread out to fit the 10 available pages on the Illustrator template.
1:5 appeared reasonable, in that all the components can fit nicely in one 400x120mm material sheet. However, I imagined the assembly will be quite complicated as each piece is extremely small, with others having delicate features such as cut-outs for windows and doors.
-----
ABOUT THE SPACE
For this activity, the formation of 3 rectangular prisms in 2.5 modelling on Fusion360 were required to form a transitional space.
However, I chose to use 4 rectangular prisms in total to maintain the original SYMMETRY of the main hallway immediately after entering the front door of my home.
This Fusion360 model includes the following:
However, I chose to use 4 rectangular prisms in total to maintain the original SYMMETRY of the main hallway immediately after entering the front door of my home.
This Fusion360 model includes the following:
◦ PRISM #1 Long hallway on ground floor
◦ PRISM #2 Rectangular strip of space perpendicular to hallway
- T-shaped staircase* void on rectangular strip
◦ PRISM #3 Bedroom 1 on first floor
◦ PRISM #4 Bedroom 2 on first floor
My aim for this model was to communicate the transitional spaces and the connection between the 4 rectangular prisms with as much clarity as possible. This is also why I have created voids throughout the model to indicate where the stairs, windows and doors should be to better communicate the nature of each prism and their relationship to the overall model scheme.
i.e.
Prism 1 represents the hallway, and acts as a transitional space - almost like a bridge - towards the second prism.
Prism 2 is also a transitional space which houses the *staircase connecting the ground floor to the first floor. To communicate this more clearly, I placed a T-shaped void on the 'ceiling' of prism 2 to accomodate the stairs that should be placed in that space.
Prism 3 and 4 represent the bedrooms on the first floor, which can also act as the 'destination' of the transitional spaces aforementioned. Each are placed directly above and on opposite sides of Prism 1 to maintain symmetry in the overall architectural scheme.
ABOVE: Top view of model (LEFT) and bubble map of space distribution (RIGHT)


Comments
Post a Comment